
Have you ever wondered why most professional and educational presentations include a hierarchical diagram that explains concepts in a bird’s eye view? Well, that is called a mind map and is an extremely crucial tool for everybody!
A mind map is one of the most stunning tools for organizing and understanding information. It allows you to contextualize data and highlight keywords and important points. It is widely used by people from all walks of life, including students, teachers, designers, entrepreneurs, managers, and top-level executives.
If you find it difficult to create a mind map in Google Slides, here is a tutorial where i will walk you through the basics and help you create a stunning mind map!
Organizing Your Mind Map
The main aim of a mind map is to break down complex topics into simpler and shorter ones for ease of understanding. Before making your mind map, the key step is to plan and organize the issues you would include.
You can begin with a central idea in the middle of the mind map, draw branches around it to mention its sub-topics, and further add details to it by creating more components under the sub-headings. This would allow you to divide information and easily remember it.
For instance, while crafting a mind map for a Historical Era, you can write the era’s name in the middle, mention different periods on the branches, and jot down respective events under them.
Creating the Central Idea
This is the top hierarchy level in your mind map or the main concept. Let us understand how we can create this with the example of a Language Learning mind map.
Step 1 – Open your presentation and hop onto the slide where you want to create your mind map.
Step 2 – Go to the toolbar, click on ‘Insert’ and select ‘Text Box.’ Type the heading of your mind map.
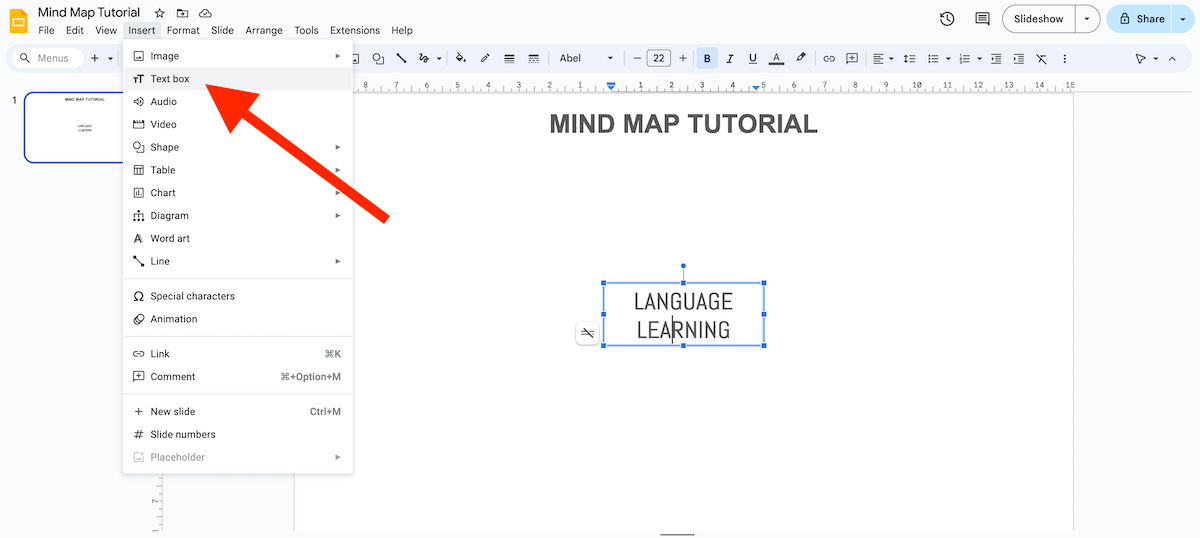
Step 3 – You can edit the text using various editing options from the toolbar. You can adjust the font, size, color, and more according to your choice.
Adding Branches to the Mind Map
Let us add the branches with sub-topics to our mind map.
Step 1 – Plan the number of branches that you need. For instance, we need six branches representing various steps to learn a language.
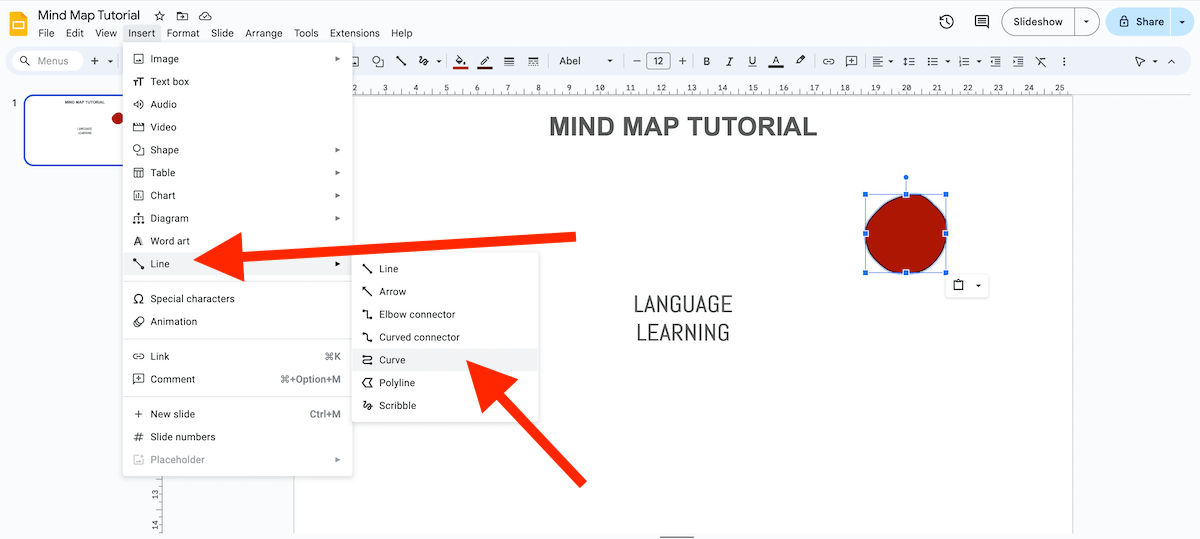
Step 2 – Let us add shapes to our sub-topics. Click on Insert > Shapes > Shapes >Rectangle from the toolbar dropdown menu. If you want your shapes to look like hand drawn shapes, Click on Insert > Line > Curve. You can easily make a hand drawn circle.
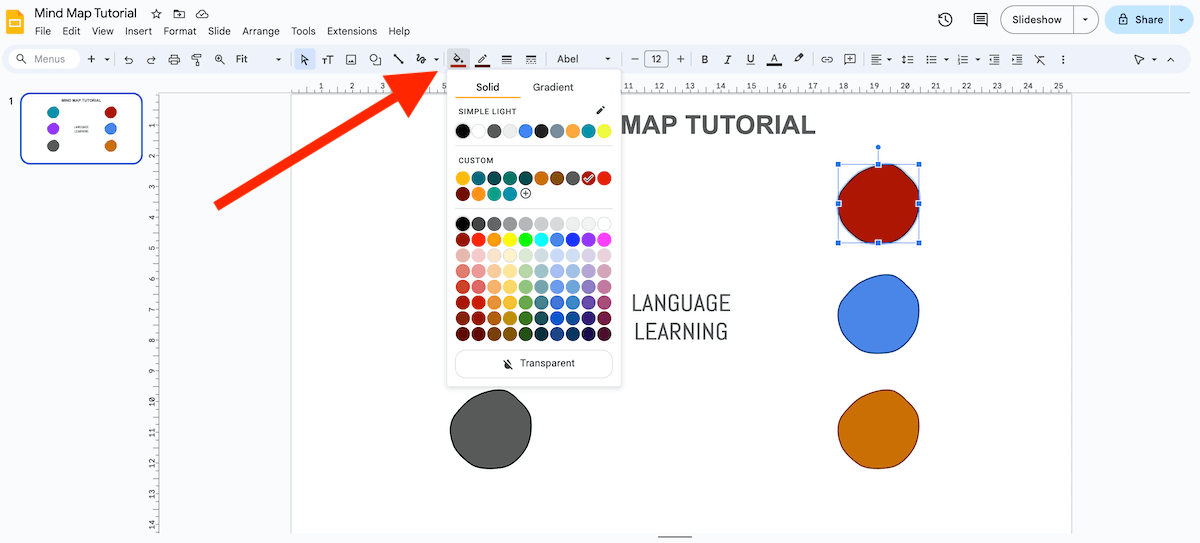
Step 3 – Click and drag to adjust the shape and its size. You can fill in color, add borders, and edit it per your requirement.
Step 4 – Add one such shape to each branch or you can simply copy and paste the shapes. Step 5 – Click on the shape, and an outline in blue will appear. Start typing your sub-headings here in shape.

Adding More Information to the Sub-Headings
Let us write more about sub-topics underneath them and create a more informative mind map.
Step 1 – Go to the ‘Insert’ option on the toolbar, and select ‘Text Box’ from the menu. Add a text box under each sub-heading. Or if you want to make it more creative you can scribble a shape which will again look like a hand drawn shape. Click on Insert > Line > Scribble

Step 2 – Write the necessary information, and your mind map is ready!
Adding Connectors or Arrows to Your Mind Map
An effective mind map combines colors, fonts, connectors, icons, and illustrations. Here, we will add arrows connecting our main idea to its subheadings.
Step 1 – To add an arrow connector, click on Insert > Line. Choose the type of line you wish to insert. Again you can create a hand drawn line shape. Click on Insert > Line > Scribble
Step 2 – Adjust the lines and align them with the branches.
You can opt for curves instead of arrows and play with colors, designs, line weight, and density with the help of the editing options on the toolbar.

Your mind map is ready!